
How to Perform Entity Data Table Checks
Entity Data Table Checks is a new feature added to enable the validation of specific custom details during particular actions by using custom data tables.
For example, if you need to verify a client’s existing bank account before creating the client, you can create your own custom data table with an Existing Bank Account column and validate the information before proceeding with the client creation.
How to Create Entity Data Table Checks
Step 1:
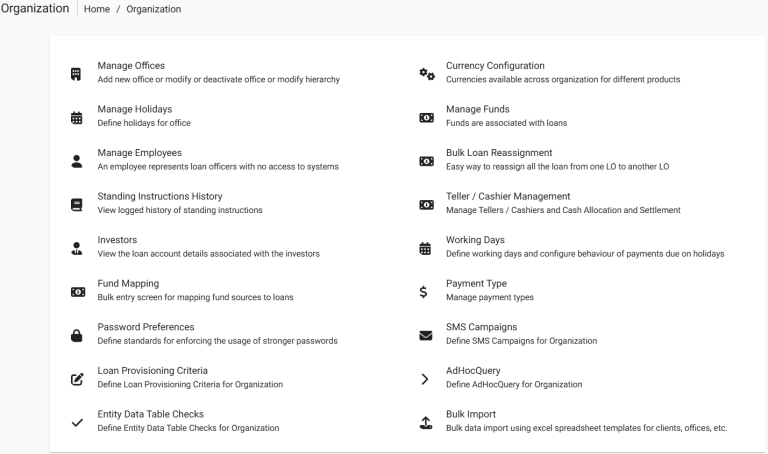
From the Home screen, click Admin, then select Organization from the drop-down menu. This will open the Organization menu. Select Entity Data Table Checks.
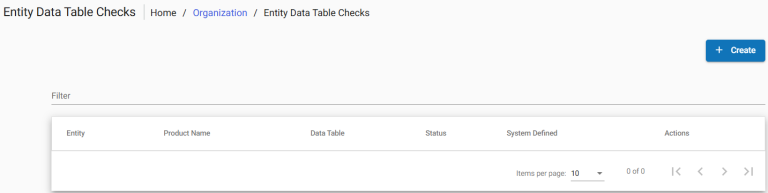
This will open the Entity Data Table Checks page.
Step 2:
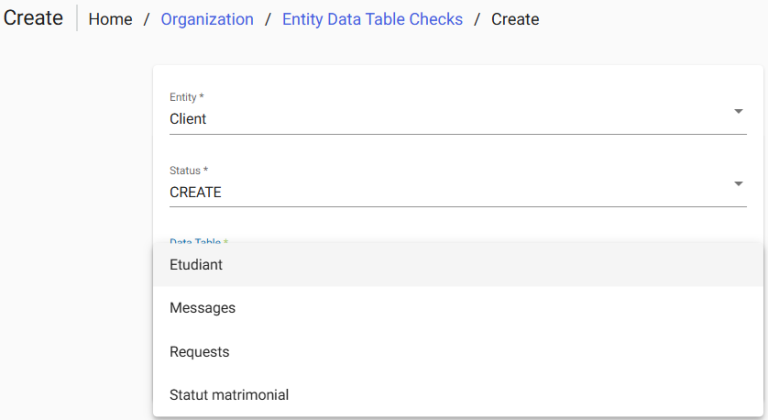
Click the Create button, which will open the page below:
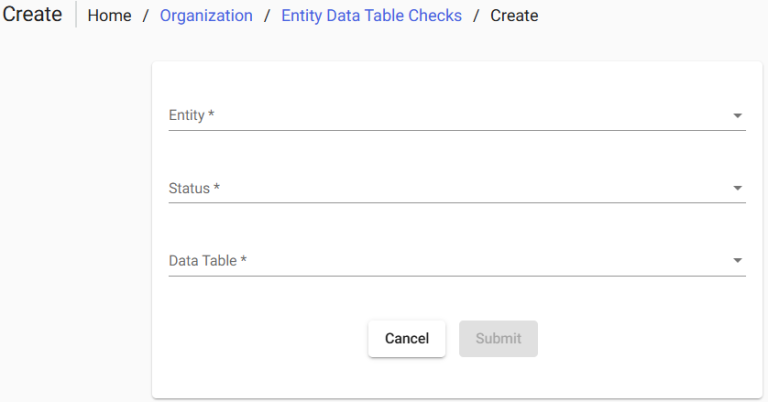
Field Descriptions
| Field | Description |
|---|---|
| Entity (Required | This field specifies which entity will be subjected to entity data table checks. Only four entities are supported for this validation: Client, Group, Loan, and Savings Account. |
| Status (Required) | This field indicates when the specified entity should undergo validation. The available status values vary depending on the entity and may include: Create, Approve, Activate, Write Off, Withdraw, Reject, or Close. |
| Data Table (Required) | This field specifies what should be validated. These are custom data tables created through Data Table Management. Based on the custom table created, additional screens are generated for the specified entity at the specified status. All columns in the custom table are displayed as fields on these additional screens. |
| Product | This field is enabled only for Loan and Savings Account entities. All loan products are available in a drop-down list for the Loan entity, and all savings products are available in a drop-down list for the Savings Account entity. |
An unlimited number of entity data table checks can be created for each of the four supported entities.
Creating a Data Table Check for the Client Entity
Navigate to the Entity Data Table Checks page and click the + Create Entity Data Table Check button. This will open a pop-up window. Refer to the previous section for details on how to access this page.
In the Entity field, select Client from the drop-down menu.
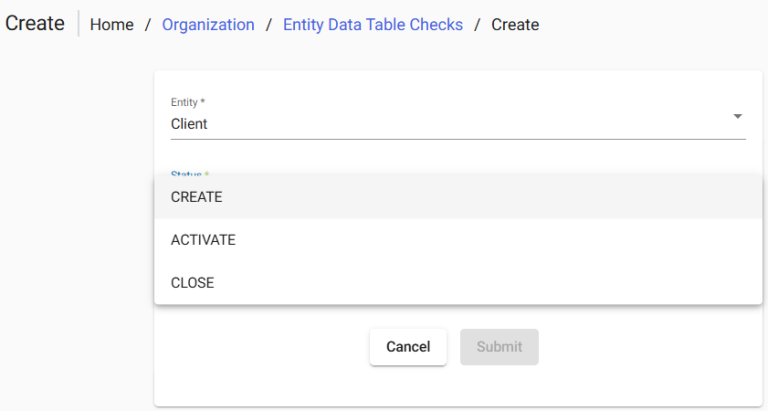
For the Client entity, only three statuses are available:
| Drop-down Value | Description |
|---|---|
| CREATE | Entity data table checks are triggered during client creation. |
| ACTIVATE | Entity data table checks are triggered during client activation. |
| CLOSE | Entity data table checks are triggered during client closure. |
The created data tables are available in the Data Table drop-down menu.
To create a custom data table, select Admin at the top of the screen, then choose System from the drop-down menu. Select Manage Data Tables, then click the + Create Data Table button.
Once the data table has been created, it will appear in the Data Table drop-down list.
For each entity data table check that is created, the corresponding pages are updated.
For example, an Entity Data Table Check has been created for the Client entity with the CREATE status. As a result, the client creation page contains additional wizards as shown below.
In this example, two checks have been created for client creation through the wizard:
- Client Bank Details
- Family Details
The corresponding fields are automatically generated from the data tables created on the Manage Data Tables page.
>> Create Client
This is the client creation screen with an additional wizard containing the Client Bank Details and Family Details sections.
Only the CREATE status uses wizards. For other statuses, additional tabs will be created instead.
After clicking Continue, the current screen moves to the next page.
